Oh no- your kid has lice! Before you panic (and start itching), take a deep breath. You’re not alone, and you’ve totally got this. Lice are common, especially in school-aged kids, and it’s completely manageable. Let’s get you prepped with everything you need to know to handle the situation like a pro!


Step 1: Don’t Freak Out (Seriously)
The first thing to remember: it’s not a reflection of your parenting skills. It’s also not the end of the world. Lice are pesky little creatures that love human hair, but they don’t carry diseases. It’s uncomfortable and a bit annoying, but with the right tools, you’ll be rid of them in no time!
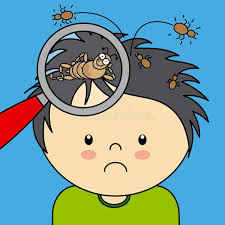
Step 2: Check for Lice (It’s Time for the Big Search)
Alright, now it’s time to go detective mode. Gather some bright lighting, a fine-toothed comb, and maybe a magnifying glass for good measure. Part your child’s hair into sections. Check closely near the scalp. Focus especially behind the ears and the nape of the neck. Lice eggs (nits) look like tiny, oval specks that are glued to the hair shaft. If you find them don’t panic. You’re already halfway there!
Step 3: Treatment Time (You’ve got Options!)
There are plenty of over-the-counter treatments available that can help eliminate lice. From shampoos to mousse, pick what works best for your family. Some natural remedies can also do the trick, like olive oil or tea tree oil (though effectiveness may vary). Make sure to follow the instructions carefully and treat the whole family if needed. Lice are social little bugs, so they’ll want to spread around if given the chance!
Personal Preference with experience- I have used and been successful with organic coconut oil. It’s easier to work with because it starts as a solid and in your hands, it melts. I heavily saturate all the hair and wrap in bun, with a shower cap. So there not a mess left everywhere on clothing/furniture. Leave on for over 4 hrs. I usually do this on a weekend day. I leave oil in hair all weekend. I follow through with this routine for the next 2 weeks.
Step 4: Combing out the Nits (The Lice-Free Challenge)
This step requires patience. After treatment, use a nit comb to carefully comb through your child’s hair, section by section. This is the best way to remove those stubborn effs. Set a timer and treat it like a fun challenge- who can do the best combing? You might even want to reward your child with a special treat afterwards.
With this step nits will shine in light and look translucent. I personally pick the eggs. I slide them down the shaft of hair to remove them completely. To do this you just pinch it between your thumb nail and index nail. You don’t want to risk them hatching. They have to have warmth and close placement to scalp to feed when they hatch. If you find live lice moving around i use tweezers to grab them and submerge in hot water. Die instantly.
Step 5: Clean Everything (The Lice-Free Zone)
Lice don’t like to live far from their food source (your child’s scalp). They’re not going to infest your entire home. But it doesn’t hurt to clean up a bit. Wash bedding, clothes, and hats in hot water. Vacuum furniture, carpets, and car seats just in case. And if you’re feeling really thorough, put stuffed animals in a sealed plastic bag for a few days.
Step 6: Repeat the Process (The Journey to Victory)
Lice can be persistent, so make sure you follow up a week later with a second treatment if needed. This will ensure any remaining eggs or hatchlings are taken care of.
You’ve Got This!!
Finding our your kid has lice is a hassle, but it’s totally manageable. with a little patience and the right tools, you’ll be back to normal in no time. Stay calm, stay positive, and remember: it’s just another parenting adventure.